
Hello and welcome!
We’re Honey Music School, offering online lessons in songwriting, composing, DTM (Desktop Music), and vocal training from Japan.
Today, we’ll show you how to set up your system for online DTM lessons.
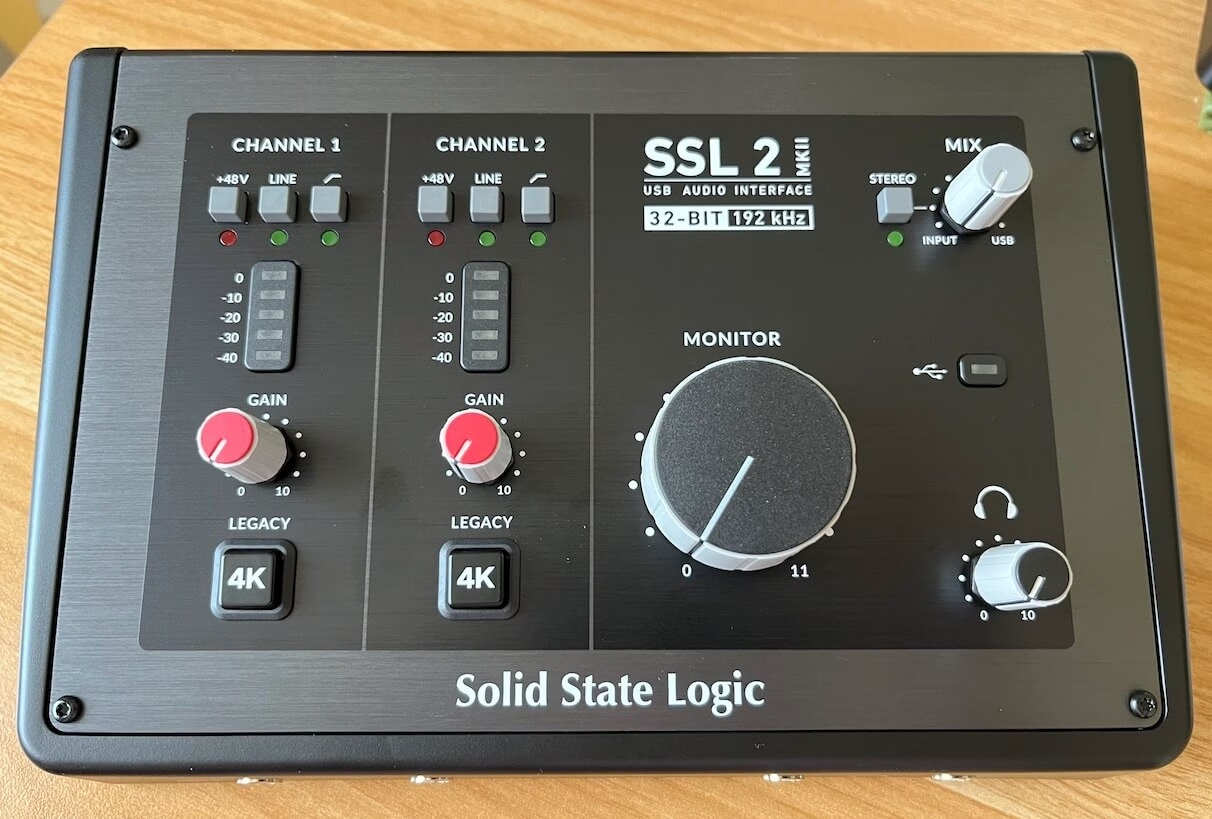
In this guide, we’ll focus on the SSL2 MKⅡ, which we highly recommend at our school. We’ll also introduce other related equipment you might need.
Main Steps
- Connect your SSL2 MKⅡ
- Install the driver
- Set up your computer’s audio settings
- Set up your DAW
- Set up Zoom
- Important steps to check before every lesson
Equipment Used in This Guide
※If you want to sing while standing, use a boom mic stand.
※If your computer doesn’t have enough USB ports, you’ll need a USB hub.
1.Connect Your SSL2 MKⅡ
Let’s start by connecting your SSL2 MKⅡ to your computer.
Step 1: Connect SSL2 MKⅡ to your computer
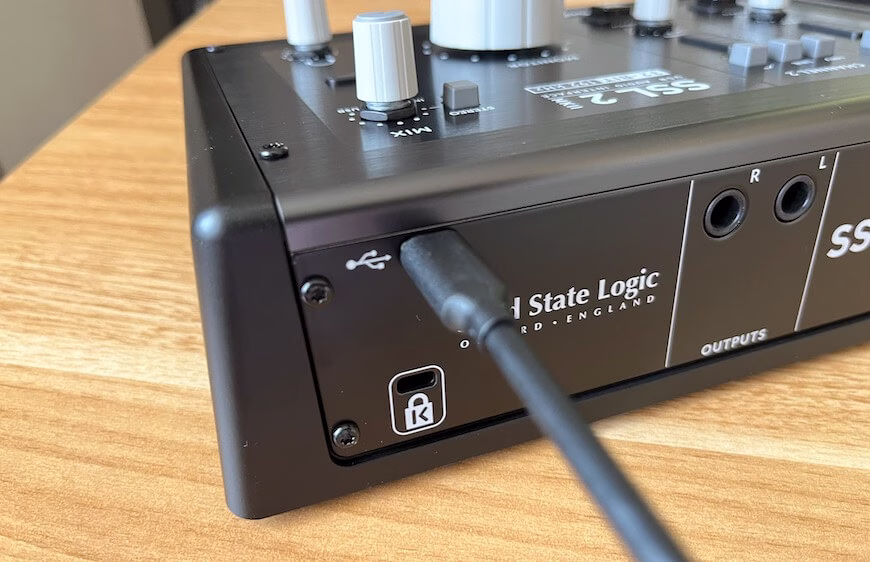
Use the included USB cable to connect the SSL2 MKⅡ and your computer.
Step 2: Connect the microphone cable

Attach the microphone cable to your microphone mounted on the stand. Push it in until you hear a click sound.
Step 3: Connect the cable to SSL2 MKⅡ
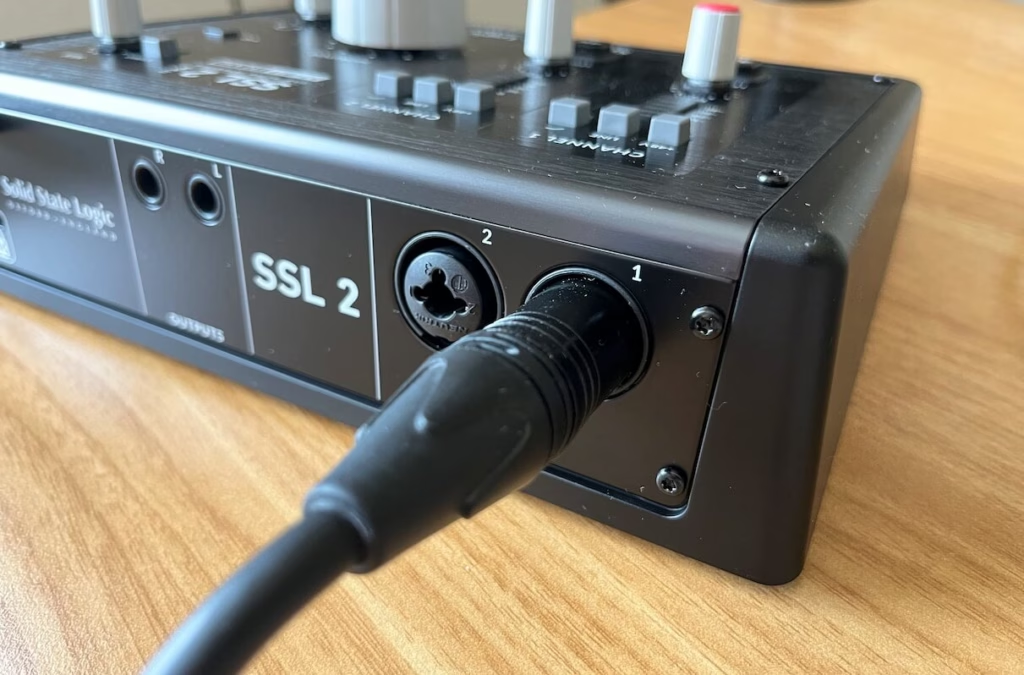
Plug the other end of the cable into Channel 1 (Input 1) on your SSL2 MKⅡ.
When using a condenser microphone, press the 48V button and set the GAIN knob to around the 3 o’clock position.
Your instructor will help you adjust the gain during the lesson.
Step 4: Connect your headphones
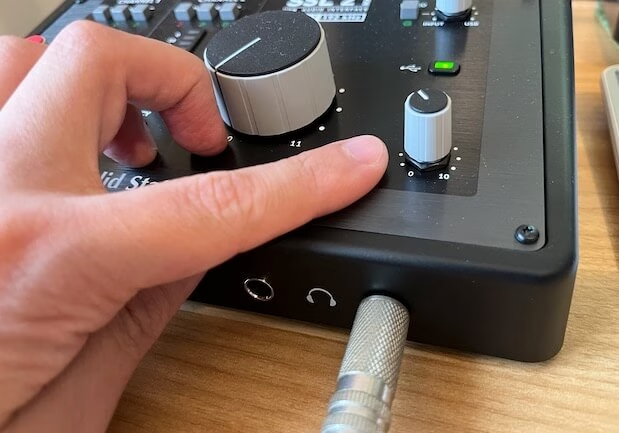
Plug in your headphones and adjust the Headphone and MIX knobs to a comfortable volume level.
2.Download and Install the Driver
To use SSL2 MKⅡ, you’ll need to install the driver.
Visit the official SSL website and download the software for your Mac or Windows computer.
After installation, restart your computer.
If you’re using a secondhand SSL2 MKⅡ, we recommend updating to the latest firmware.
3.Set Up Your Computer’s Audio Settings
Your computer may automatically detect the SSL2 MKⅡ, but please check to be sure.
For Windows
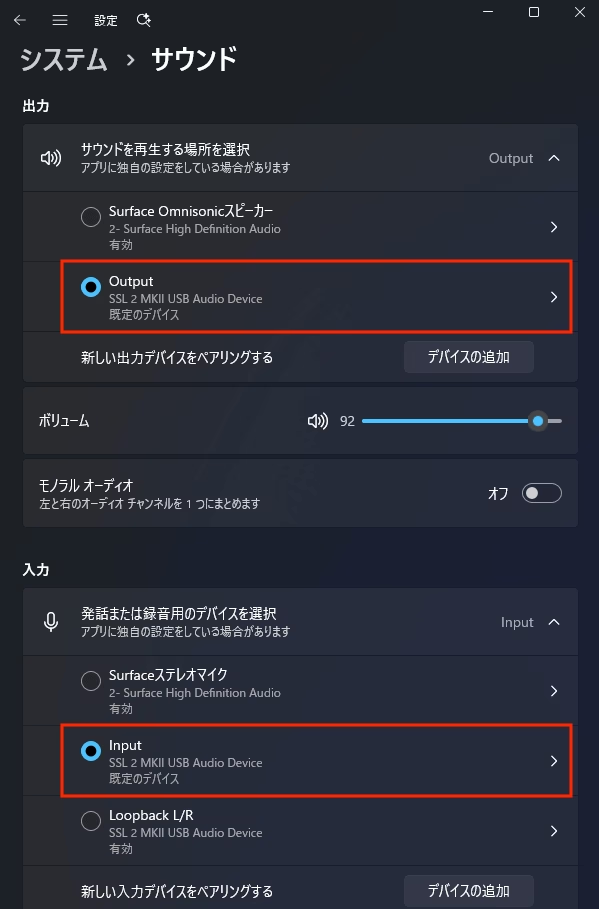
Go to Settings → System → Sound and confirm:
- Input: “Input (SSL)”
- Output: “Output (SSL)”
If both are correct, you’re good to go!
For Mac
Open System Preferences → Sound, and set both Input and Output to “SSL2 MKⅡ”.
4. Set Up Your DAW
Each DAW (Digital Audio Workstation) requires different settings.
Below are the examples for Logic Pro, GarageBand, Ableton Live, and FL Studio.
Logic Pro

Go to Logic → Settings → Audio and change both Input Device and Output Device to Zoom Audio Device.
When creating music on your own, switch back to SSL2 MKⅡ.
Click Apply Changes after setting.
If you’re using an Apple Silicon Mac and don’t see “Zoom Audio Device,” please install the Apple Silicon version of Zoom.
GarageBand

Go to GarageBand → Preferences → Audio/MIDI, then set both Input Device and Output Device to Zoom Audio Device.
Switch to SSL2 MKⅡ when making your own songs.
Same as above: use the Apple Silicon version of Zoom if the device doesn’t appear.
Ableton Live
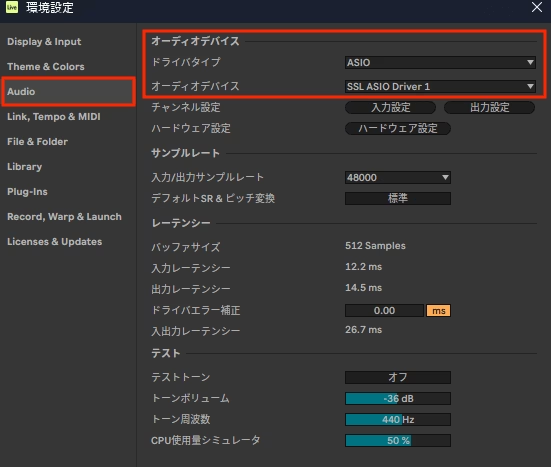
Windows:
Options → Preferences → Audio → set Driver Type to ASIO, Audio Device to SSL ASIO Driver.
Mac:
Live → Preferences → Audio → set Driver Type to CoreAudio, and both Input/Output to Zoom Audio Device.
Switch to SSL2 MKⅡ for your own production.
Apple Silicon users: install the Apple Silicon version of Zoom if “Zoom Audio Device” does not appear.

For Windows users:
In your audio track, change the monitor setting to Auto.
Your voice will be transmitted to the instructor through this track.
FL Studio
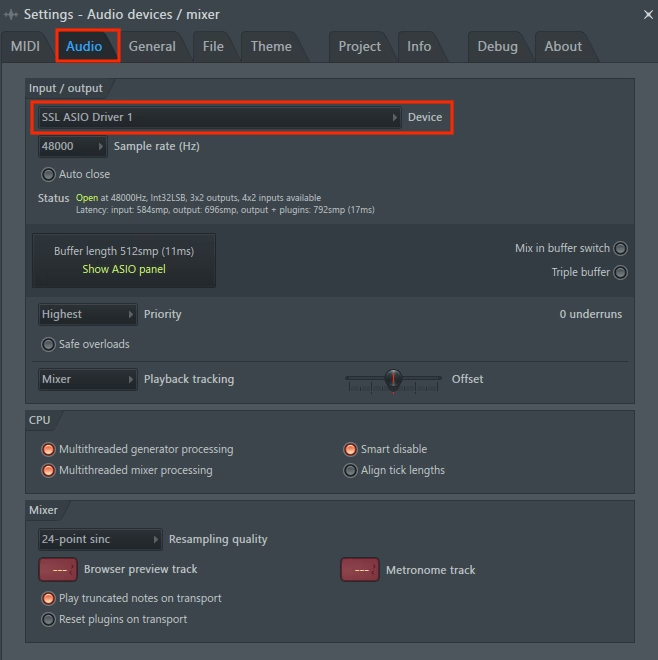
Windows:
Options → Audio Settings → Audio → Device → select SSL ASIO Driver.
Mac:
Options → Audio Settings → Audio → Device → select Zoom Audio Device.
Switch to SSL2 MKⅡ for your own music production.
Apple Silicon users: install the Apple Silicon version of Zoom if “Zoom Audio Device” does not appear.
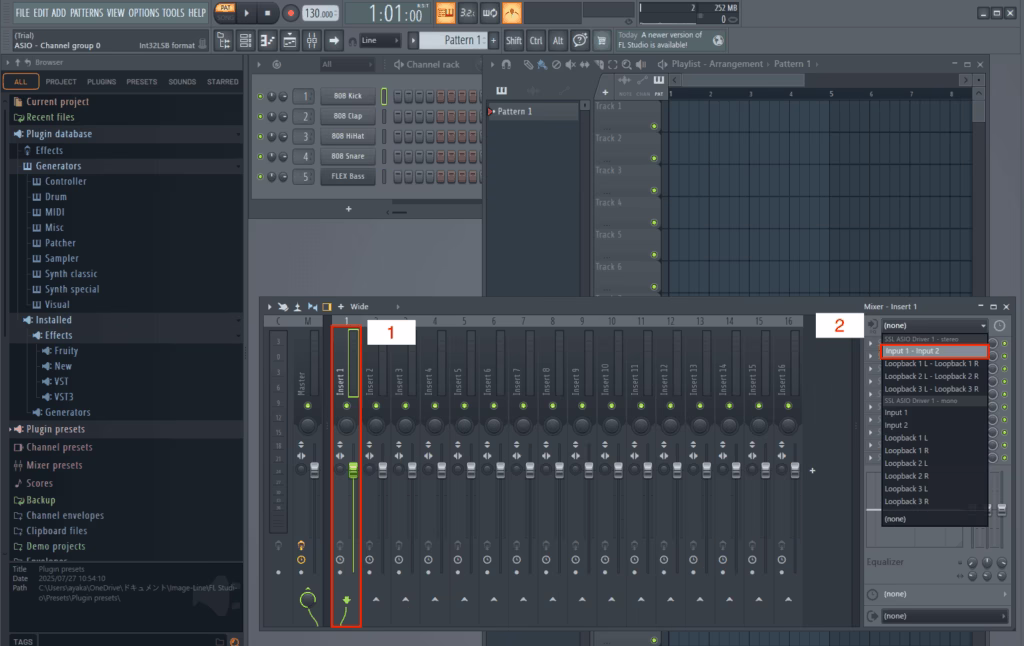
For Windows users:
In the Mixer, select a track and set its Input from “None” to “Input 1–2.”
Your voice will now pass through this track and be heard by your instructor.
5. Set Up Zoom

Open the Zoom app, sign in, and click the Settings icon.
Windows
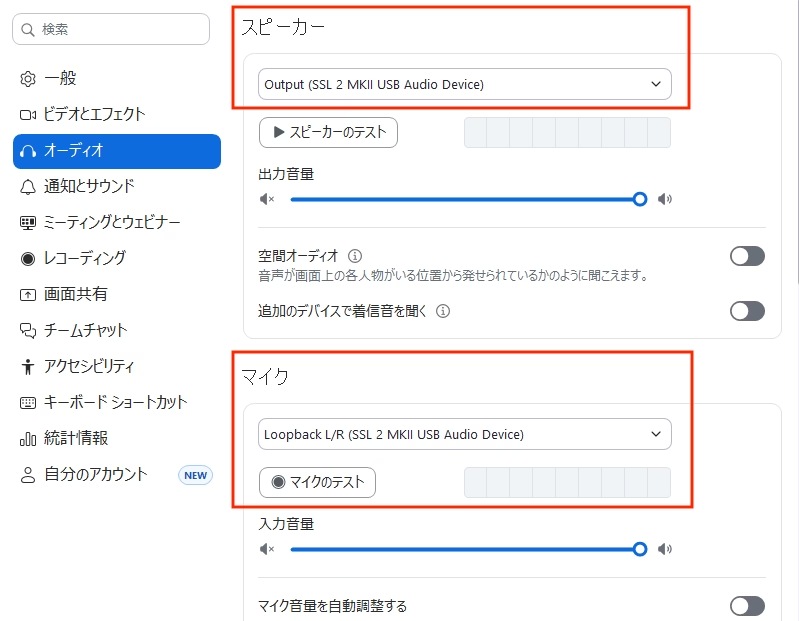
Go to Audio and select:
- Microphone: Loopback L/R (SSL)
- Speaker: Output (SSL)
Then check:
- Original Sound for Musicians
- High-Fidelity Music Mode
- Echo Cancellation
- Stereo Audio
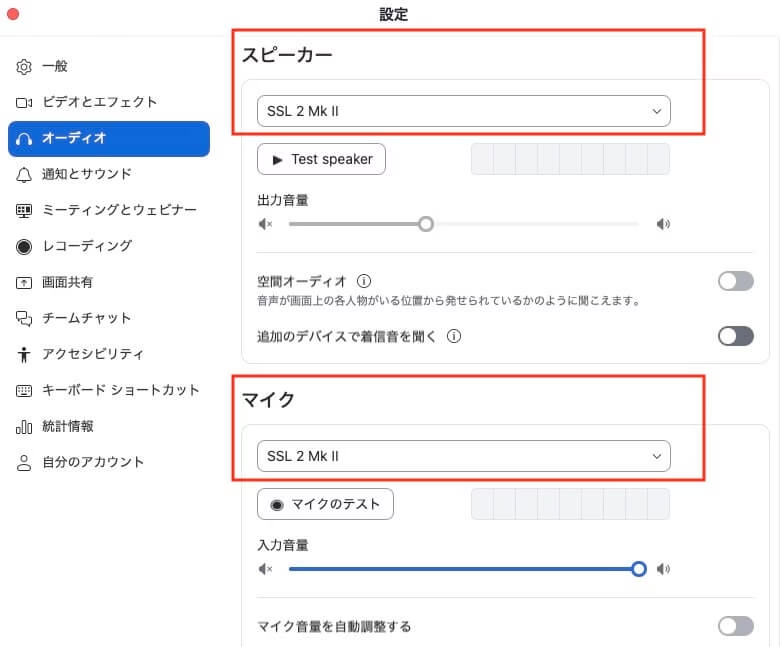
Mac
Set both Microphone and Speaker to SSL2 MKⅡ.
Then check:
- Original Sound for Musicians
- High-Fidelity Music Mode
- Echo Cancellation
Stereo Audio is not required on Mac.
6. Before Every Lesson

Always sign in to the Zoom app before your lesson.
After joining your instructor’s meeting, click the “Original Sound: Off” button at the top right of the Zoom window once — it should change to “Original Sound: On.”
This ensures that your DAW’s audio is properly sent to your instructor.
Related Articles


Honey Music School provides you Online Lessons for Voice Training, Pronunciation for Japanese Song Lyrics, Music Production, Japanese for Travel and Business. All lessons are in English by Native Japanese Instructors! Lessons are available remotely from anywhere around the World!


Comment