

This guide explains how to set up your equipment for online DTM (Desktop Music) lessons.
Contents
- Connecting MiniFuse1
- Downloading and Installing the Control Center
- Configuring Your Computer’s Audio Settings
- Setting Up Your DAW
- Setting Up Zoom
- Notes for Each Lesson
Equipment Used
※If you want to sing standing up, a boom mic stand is required.
※If your computer lacks enough USB ports, a USB hub is also necessary.
1.Connecting MiniFuse1
Let’s start by connecting the MiniFuse1 to your microphone and computer.
Step 1: Connect MiniFuse1 to your PC or Mac

Use the included USB cable to connect MiniFuse1 to your computer.
Step 2: Connect the Mic Cable to Your Microphone

Attach the mic cable to the microphone on its stand.
Step 3: Connect the Other End to MiniFuse1
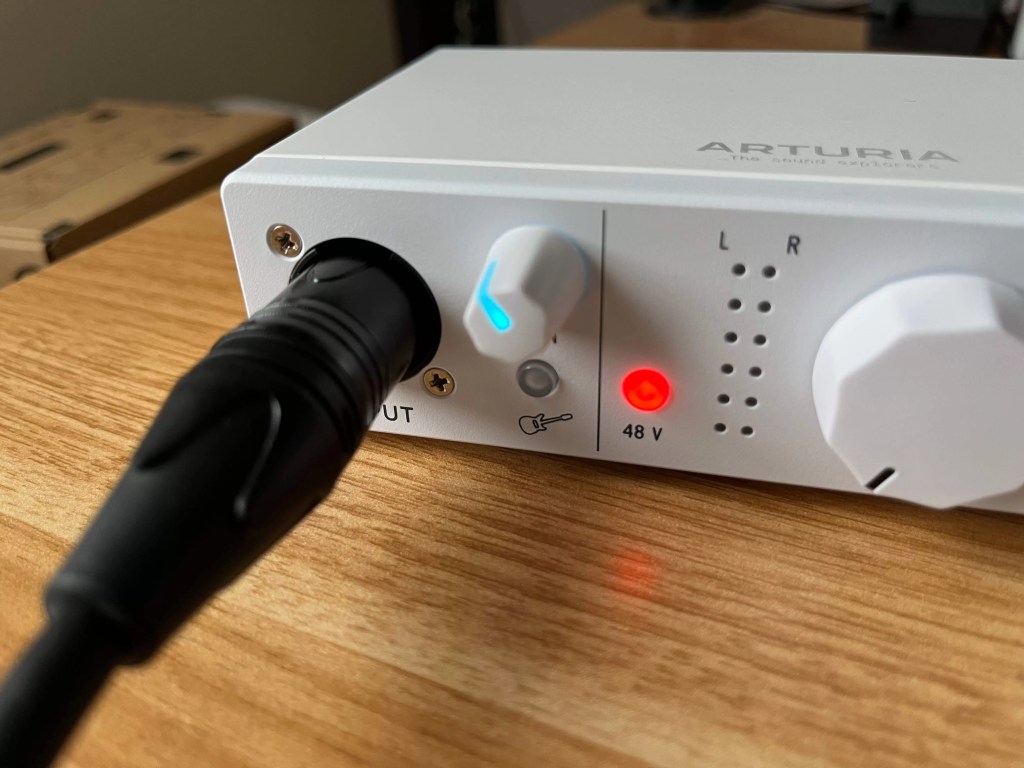
Plug the other end of the mic cable into MiniFuse1. If using a condenser mic, press the [48V] button and set the GAIN knob to about 12 o’clock. You will adjust GAIN as directed during the lesson.
Step 4: Connect Headphones
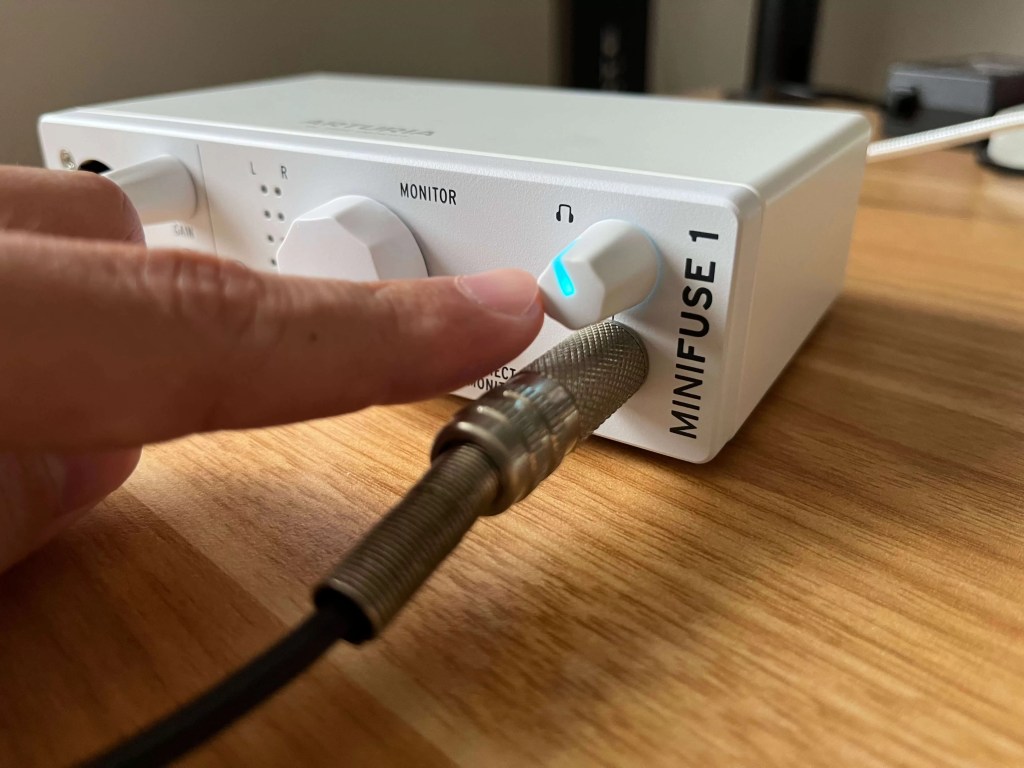
Connect your headphones to MiniFuse1. Adjust the volume to your comfort level.
2. Downloading and Installing the Control Center
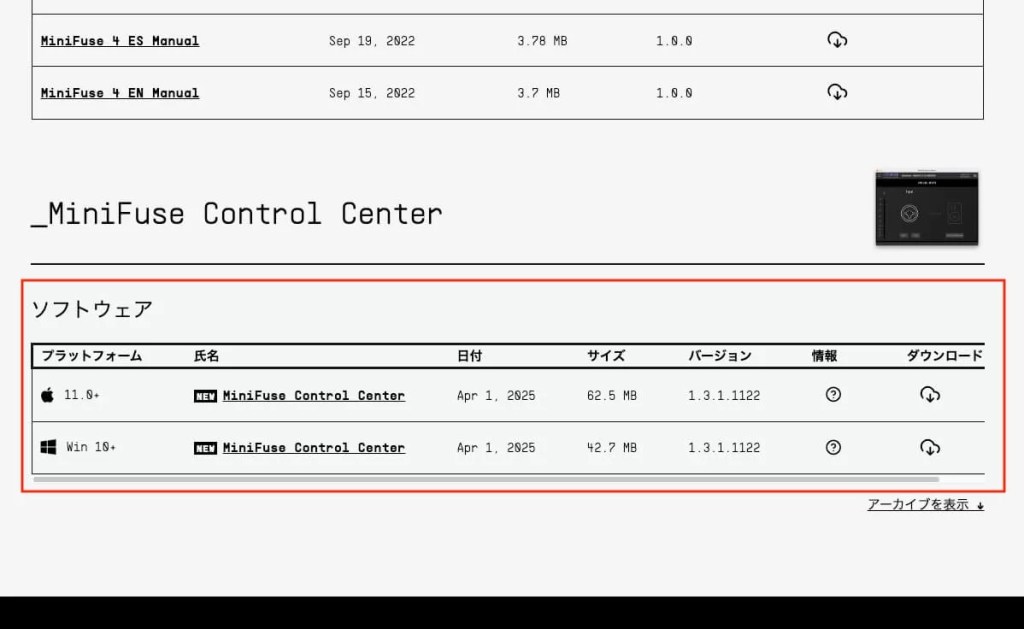
To use MiniFuse1, you must install its driver.
Please visit the official ARTURIA website and download the MiniFuse Control Center for Mac or Windows.
After installing, restart your computer just to be safe.
※If you’re using a secondhand device, make sure to update the firmware as well.
Confirming Control Center Setup

After launching MiniFuse Control Center, confirm that the [INPUTS] panel appears.
OUTPUTS Setting (Windows Only)
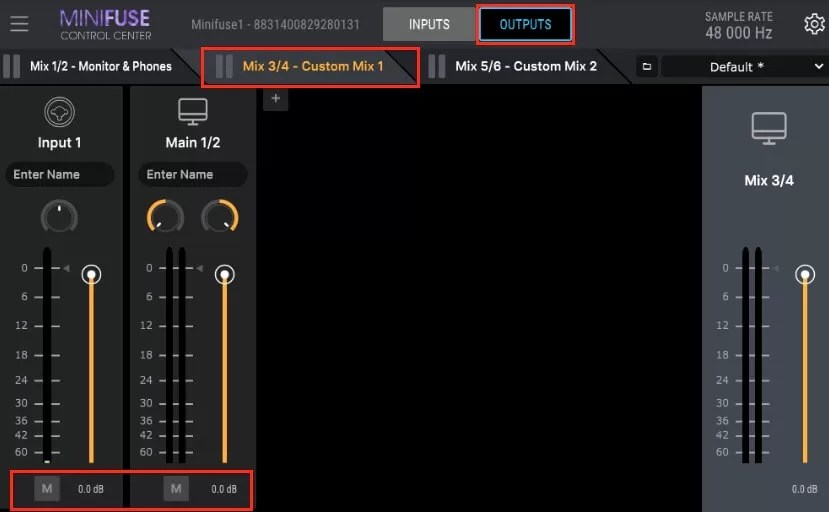
Click on [OUTPUTS] and change the setting to “Mix 3/4 – Custom Mix1”. Then turn OFF the “M” (mute) button for both “Input1” and “Main 1/2.” If your screen matches the example image, your setup is correct.
3. Computer Audio Settings
Check if your Mac or PC recognizes the MiniFuse1.
Windows

Go to Settings → System → Sound.
Set the input to “Input1” and the output to “Main 1/2”.
Mac

Go to System Preferences → Sound.
Set both input and output devices to “MiniFuse1”.
4. Setting Up Your DAW
Each DAW requires a slightly different setup. Here are examples for Logic Pro, GarageBand, Ableton Live, and FL Studio.
Logic Pro

Go to Logic → Preferences → Audio.
Set both input and output to “Zoom Audio Device” for online lessons.
If you’re working on your own project, set it back to “MiniFuse1”.
Click “Apply” after changing settings.
※If Zoom Audio Device does not appear on an Apple Silicon Mac, please install the Apple Silicon-compatible version of Zoom.
GarageBand

Go to GarageBand → Preferences → Audio/MIDI.
Change both input and output to “Zoom Audio Device”.
Switch to “MiniFuse1” for personal music production.
※If using an Apple Silicon Mac, make sure you’re using the correct Zoom version.
Ableton Live

- Windows: Options → Preferences → Audio
- Driver Type: ASIO
- Audio Device: MiniFuse ASIO Driver
- Mac: Live → Preferences → Audio
- Driver Type: CoreAudio
- Input/Output: Zoom Audio Device (change to MiniFuse1 when working solo)
※If using an Apple Silicon Mac, make sure you’re using the correct Zoom version.
FL Studio

- Windows: Options → Audio Settings → Device: MiniFuse ASIO Driver
- Mac: Options → Audio Settings → Device: Zoom Audio Device (change to MiniFuse1 when not using Zoom)
※If using an Apple Silicon Mac, make sure you’re using the correct Zoom version.
5. Zoom Settings

Open the Zoom app and log in. Click on the settings icon (gear symbol).
Windows
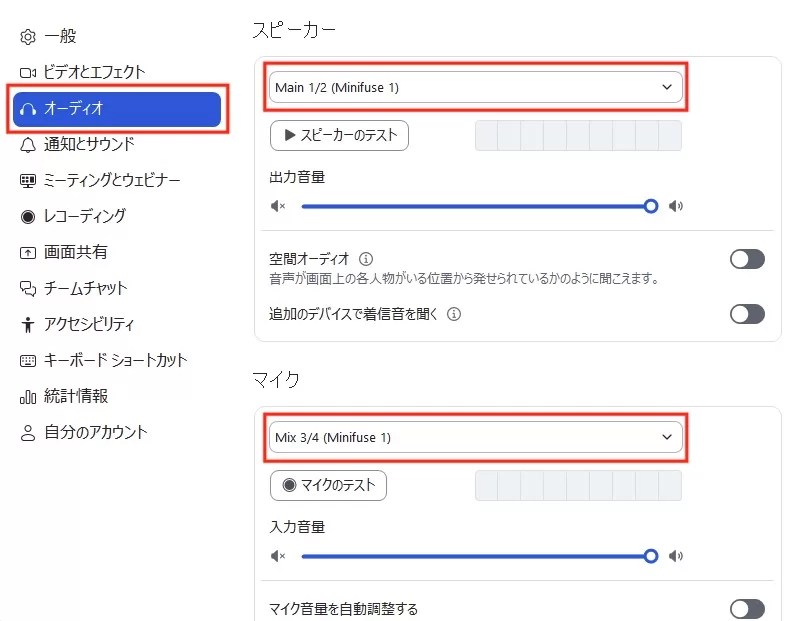
In the Audio settings, set:
- Microphone: “Mix 3/4 (MiniFuse1)”
- Speaker: “Main 1/2 (MiniFuse1)”
Check the box for “Original Sound for Musicians” and enable:
- High fidelity music mode
- Echo cancellation
- Stereo audio
Mac

Set the same options as on Windows.
Check “Original Sound for Musicians” and enable:
- High fidelity music mode
- Echo cancellation
- Do not check “Stereo audio”.
6. Notes for Each Lesson

Please start Zoom and log in before each lesson.
After joining the teacher’s Zoom meeting, click “Original Sound: Off” at the top right once to switch it to “Original Sound: On”. This allows your DAW audio to be heard by the instructor.
※Changing the audio device in the DAW or Control Center may turn off Original Sound. If the teacher can’t hear your DAW, check this setting first.
Related Articles


Honey Music School provides you Online Lessons for Voice Training, Pronunciation for Japanese Song Lyrics, Music Production, Japanese for Travel and Business. All lessons are in English by Native Japanese Instructors! Lessons are available remotely from anywhere around the World!


Comment